How to Remove Previous Owner From Nest Thermostat
Dealing with the previous owner’s settings on a Nest thermostat can be a common issue for those who have recently moved into a new home or acquired a used Nest thermostat.
In this guide, we will provide an overview of the steps to remove a previous owner from your Nest thermostat, allowing you to customize the thermostat to your preferences and make it truly your own.
Read also: How to Reset Nest Thermostat Quickly
With these steps, you can ensure that your Nest thermostat is programmed according to your desired temperature settings and schedules, providing you with optimal comfort and energy efficiency in your home. Let’s dive into the details and learn how to remove the previous owner’s settings from your Nest thermostat.
5 Steps on How to remove previous owner from Nest thermostat
Read also: How to Find Entry Key on Nest Thermostat
Step 1: Reset Your Nest Thermostat
The first step in removing a previous owner from your Nest thermostat is to perform a factory reset. This will erase all the existing settings and configurations on the thermostat, allowing you to start with a clean slate. Here’s how you can do it:
Before you reset your thermostat, write down the settings so you can easily restore them if needed. Go to Settings Nest settings icon and then Equipment on your thermostat and record your system wires, your heating type, and your Safety Temperature settings.
- Press your thermostat ring to open the Quick View menu.
- Choose Settings Nest settings icon.
- Turn the ring to Reset and press to select.
- Choose All settings:
Note: Performing a factory reset will erase all data, including schedules, preferences, and settings, from your Nest thermostat. Make sure to back up any important settings or data before proceeding with the reset.
Step 2: Create a New Nest Account
Once you have performed a factory reset on your Nest thermostat, you will need to create a new Nest account to gain full control over the device. Follow these steps to create a new Nest account:
- Download the Nest app on your mobile device from the App Store or Google Play Store.
- Open the Nest app and select “Sign up” or “Create account.”
- Follow the on-screen prompts to enter your email address, password, and other required information.
- Verify your email address by clicking on the verification link sent to your inbox.
- Complete the setup process by providing any additional information, such as your location and home details.
- Once you have created a new Nest account, you will be able to connect your Nest thermostat to the account and gain full control over its settings and configurations.
Step 4: Set Up Your Preferred Settings
Once your Nest thermostat is successfully connected to your new Nest account, you can begin setting up your preferred temperature settings, scheduling, and other preferences. Follow these steps to set up your preferred settings:
In the Nest app, select your Nest thermostat from the list of devices.
- Tap on the “Settings” or “Gear” icon to access the settings menu.
- Adjust the temperature settings, scheduling, and other preferences according to your preferences.
- Save your settings and exit the settings menu.
- You can customize your Nest thermostat to match your desired temperature settings and scheduling preferences, allowing you to optimize comfort and energy efficiency in your home.
Read also: Can You Run Fan Only Without AC On Nest Thermostat?
Step 5: Customize Your Nest Thermostat to Your Home
To further customize your Nest thermostat to your specific home, you can configure additional settings and options. Here are some customization options you can consider:
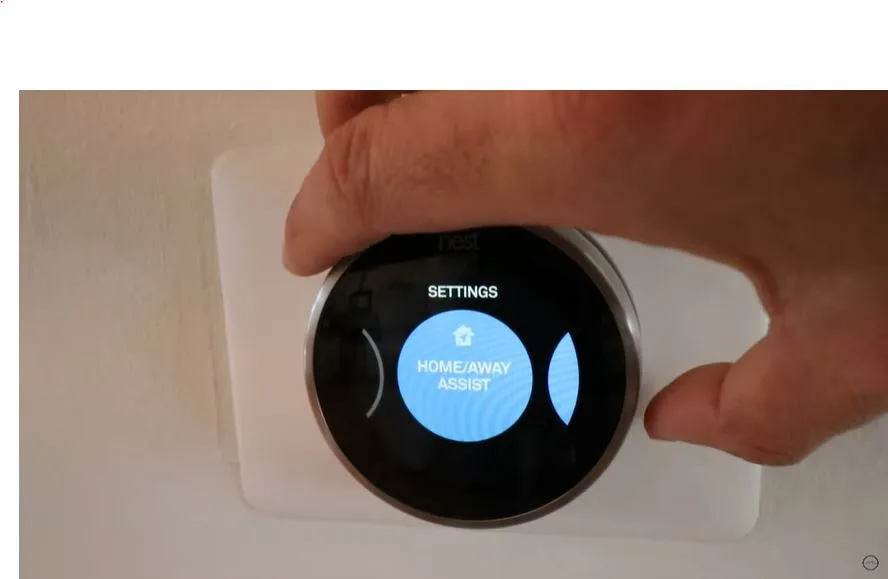
Set up home/away assist: You can enable the home/away assist feature, which uses your phone’s location to automatically adjust the thermostat when you leave or return home.
Connect with other smart devices: You can connect your Nest thermostat to other smart devices, such as smart speakers or smart home systems, for additional control and automation options.
Enable energy-saving features: You can enable energy-saving features, such as Eco mode, to help reduce energy consumption and lower your utility bills.
By customizing your Nest thermostat to your home, you can ensure optimal performance and energy efficiency, tailored to your specific needs and preferences
More resources: https://support.google.com/googlenest/answer/9247296?hl=en-GB
![What is Nest Heat Pump Balance? [An Energy Conserving Feature]](https://thermostating.com/wp-content/uploads/2023/01/heat-pump-blance-on-nest-jpg.webp)
![No Fan Option On Nest Thermostat [Fixed]](https://thermostating.com/wp-content/uploads/2023/04/nest-fan-time-768x422.webp)
![Nest Thermostat Not Blowing Cold Air [Easy Fixes]](https://thermostating.com/wp-content/uploads/2022/12/nest-thermostat-768x416.png)
![Nest Thermostat Blowing Hot Air On Cool [Easy Fix]](https://thermostating.com/wp-content/uploads/2023/01/nest-set-to-73-768x415.webp)