How to Fix Bradford White Thermostat Well Sensor Fault
A thermostat well sensor fault on a Bradford white heater is generally caused by a bad thermocouple or a defective control valve. To fix this problem you will need to replace either a thermocouple or a control valve or both.
Troubleshooting Bradford white thermostat well sensor fault
The table below shows the possible causes for the thermostat well sensor fault and their main fixes.
| Possible cause | Main Fix |
| Bad thermocouple | Replace thermocouple |
| Defective control valve | Replace control valve |
| Defective thermopile | Replace thermopile |
The first thing you want to do when you are facing a thermostat well sensor fault is to check the thermocouple for continuity. When a thermocouple is defective, it will have no continuity. You will need a multimeter to test it. And if there is nothing wrong with a thermocouple, you will need to check the gas control valve.
Read also: How to fix Honeywell thermostt red light
Procedure for testing a thermocouple
- Start by disconnecting thermocouple from gas control. You want to make sure you turn off gas at shutoff.
- The second step,you need a multimeter to test it for continuity.
- Connect one alligator clip to the end ball or contact portion of the thermocouple, and the other alligator clip to the copper portion of the thermocouple.
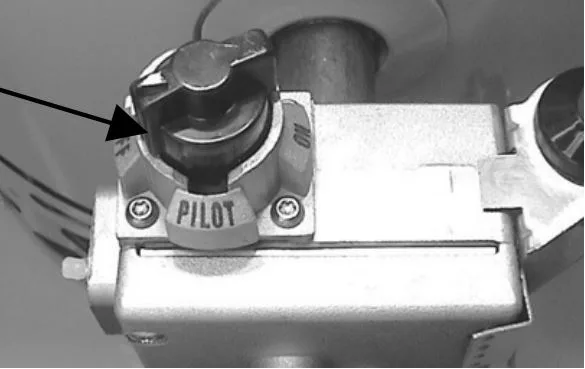
- Light the pilot as you would normally do and allow it to operate for three minutes.( Hold the gas control knob down in the “PILOT” position during this test). If there is a reading of 20 to 30 millivolts, then the thermocouple is most likely not defective and you will need to check the gas control valve at this point.
Otherwise if the readings are out of the acceptable range, you probably have a bad thermocouple and you have to replace it. Below are the steps on how you can replace a bad thermocouple.
- Start by Turning off the gas supply to the water heater. You can do this by simply Rotating knob of gas control to “OFF” position
- Remove the outer jacket door and slide open the inner combustion chamber door.
- At this step, disconnect thermocouple from gas control.
- Locate the other end of the thermocouple inside of the combustion chamber and remove it from the pilot bracket. Pull firmly pulling away from the pilot assembly.
- At this step, if you have already gotten a new thermocouple, Install it into the pilot bracket making certain the thermocouple is fully engaged into the pilot Bracket.
- Connect the other end of the thermocouple to gas control.
- Route carefully through the relief opening in the combustion chamber kit.
- To resume operation follow the instructions located on the lighting instruction label or the lighting instructions located in the installation and operation manual.
- Final step of the procedure, slide the inner door closed when finished.
Seel also: How to reset Dometic thermostat
Procedure for testing and replacing a thermopile
Another problem that can cause the Bradford white thermostat well sensor is a bad thermopile. When this part is defective, you will need a replacement as it is non repairable part. While testing, a thermocouple requires special testing tools. But you may still want to test it before replacing it. So here are the steps to complete this task
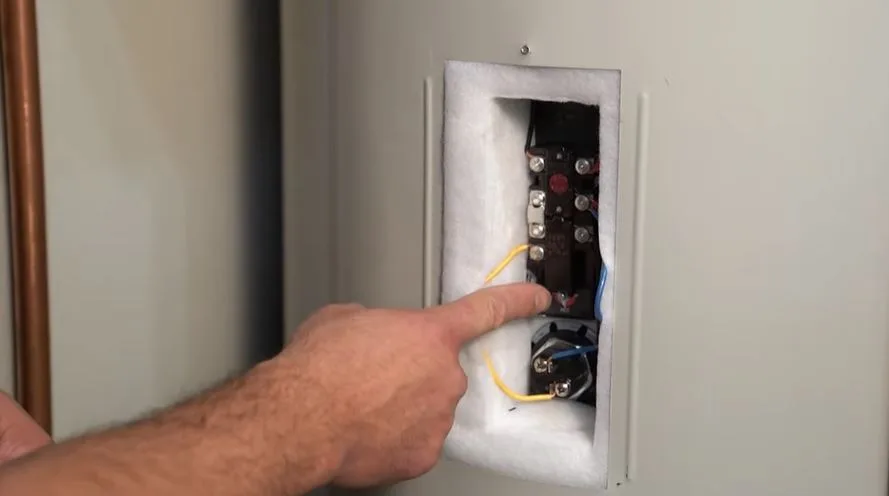
- Start by first disconnecting the red and white thermopile wires from the wire harness leading to the gas control.
- Use a multimeter to check for continuity across thermopile leads.
- Light the pilot and allow the gas control to operate for three minutes
- If you have any reading above 400 millivolts, then you have a good thermopile. Anything lower than 400 millivolts will require thermopile replacement.
Read also: Furnace Pilot Light Is On But No Heat Coming [Fixed]
If you get a new thermopile and want to replace the old one, below are the steps to follow;
- Start by turning off the gas supply to the water heater.
- Remove the outer jacket door.
- Remove or slide open the inner combustion chamber door.
- Then Disconnect The two thermopile wires ( red and white) from the wire harness leading to the gas control.
- Lastly disconnect the thermopile from the pilot bracket using a 7/16” open-end wrench.
To install a new thermopile
- If you have already bought a new thermopile, install it into the pilot bracket and tighten the threads.
- Route new wires through the appropriate opening in the combustion chamber.
- Reconnect the lead wires being careful to match the colors (red to red and white to white).
- Reinstall, or slide closed, inner combustion chamber door.
- Replace the outer door.
To resume operation follow the instructions located on the lighting instruction label or the lighting
instructions located in the installation and operation manual
See also: Bradford White Water Heater Pilot Wont Light [Fixed]
Procedure for Gas Control Valve replacement
Now it must be noted that the control valve is non repairable when it is defective. So if the other parts are working normally there is a high chance that the control valve is defective. To test it, try performing the following tasks.
- Put the Knob of the gas control on the “OFF” position.
- Turn off the gas supply to the water heater.
- Disconnect gas supply line from gas control.
- Turn off the water supply
- Drain the water heater completely.
- Remove the outer jacket burner access door.
- Slide open the inner combustion chamber door.
More tips on how to fix thermostat well sensor fault
- Remember to turn off the gas supply at the shut off. Gas leaks can pose a danger to health and can even cause explosions, fire, loss of property and even death
- If you are going to replace the gas valve, ensure to follow proper rules and procedures for installation.
- Before getting any replacement parts, check the model numbers and any identifying information for your parts.
- Remember Follow local codes where needed.
- If you are not comfortable undertaking this task yourself, contact a qualified technician.
FAQ
How to Reset Bradford White Water Heater Thermostat Well Sensor Fault
Turn off the power to the water heater: This can be done by turning off the breaker that powers the unit or by unplugging it if it’s an electric water heater.
Locate the reset button: The reset button is usually located on the thermostat, which is typically near the top of the water heater tank.
Press the reset button: Press the reset button and hold it for 15 to 20 seconds. If the reset button is not easily accessible, you may need to remove the access panel to reach it.
Turn the power back on: Once you’ve held the reset button for the required time, turn the power back on to the water heater.
Check the operation: After turning the power back on, check to see if the water heater is functioning properly.
What are the Symptoms of a bad WATER HEATER thermostat sensor?
Inconsistent hot water temperature: If the thermostat sensor is not accurately measuring the temperature of the water, it can result in hot water that is too hot, too cold, or inconsistent from one use to the next.
No hot water: If the thermostat sensor is not functioning properly, it can prevent the heating element from turning on, resulting in no hot water.
Overheating: A malfunctioning thermostat sensor can cause the water heater to overheat, which can be a safety hazard.
More resouces on troublehotting bradfor heater issues
https://www.justanswer.com/hvac/fr8q7-pilot-light-bradford-water-heater-stays-lit.html
See also: How to Fix Honeywell Temperature Sensor Failure 5 Flashes
![Amazon Thermostat Blowing Hot Air On Cool [Fixed]](https://thermostating.com/wp-content/uploads/2023/03/Amazon-thermostat-jpg.webp)
![Honeywell thermostat blowing fuse [Causes and Fixes]](https://thermostating.com/wp-content/uploads/2022/12/fuse-on-control-board-768x389.png)
![Honeywell Purge Light Blinking? [Solved]](https://thermostating.com/wp-content/uploads/2023/03/true-zone-jpg.webp)
![Honeywell Thermostat Not Showing Cool Option [Solved]](https://thermostating.com/wp-content/uploads/2022/12/honeywell-on-the-wall-768x409.webp)
![What is Nest Heat Pump Balance? [An Energy Conserving Feature]](https://thermostating.com/wp-content/uploads/2023/01/heat-pump-blance-on-nest-jpg.webp)