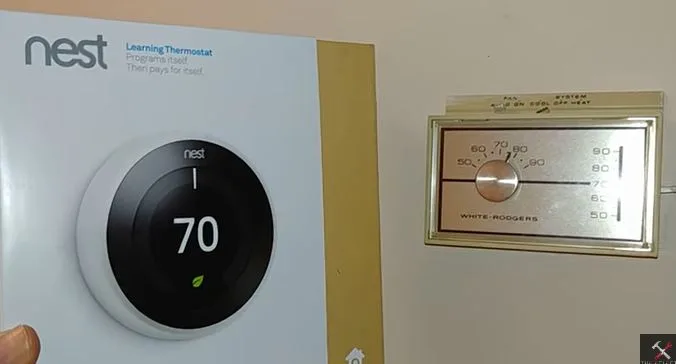
White Rodgers Thermostat Wiring to Nest [How To]
If you currently have a White Rodgers thermostat and want to take advantage of the advanced features of a Nest thermostat, we have you covered. In this guide, we will provide you with step-by-step instructions on how to wire your White Rodgers thermostat to a Nest thermostat, allowing you to elevate your home’s comfort and energy efficiency with modern smart home technology. Let’s dive in!
White Rodgers Thermostat Wiring to Nest [7 Easy Steps]
Whether you are using an old mercury white Rodgers thermostat or not, the principle of wiring it to Nest thermostat is much pretty the same.
As I always say, if you are not comfortable doing this or you are not really sure of what you are doing its best to call a local qualified technician. But if you choose to do this yourself, the tas should not take you more than half an hour
For a mery thermostat you’’ typically have to remove the cover that houses the adjusting knob and the second plate that houses the mercury before you can reach out to the actual wire plate. Let’s take a look at the steps:
Read also: Old Trane Thermostat Wiring To New Thermostat [Full Guide]
Step 1: Turn off Power
Before starting any wiring work, you’ll have to turn off the power to your HVAC system by switching off the circuit breaker. This is to avoid blowing out any fuses and also for your safety. Once power is ff, heave over to your thermostat an snap off the cover
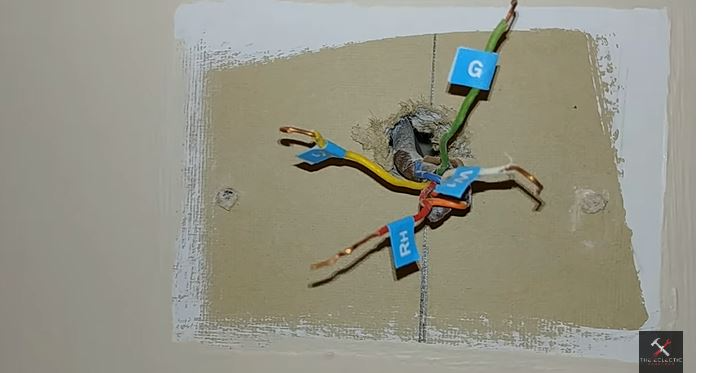
Step 2: Take Note of Existing Wiring
You are first going to clip off the covers. After clipping off the main cover you should see the second one that houses the mercury which you should also have to remove.( only if you use the mercury thermostat). However if you have a non mercury thermostat you should straight see the wiring.
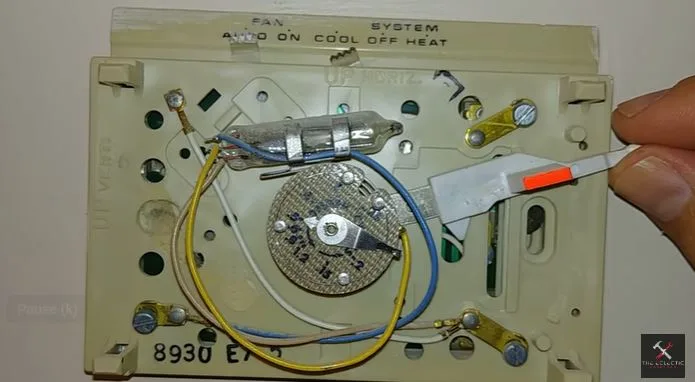
Take a clear picture or make note of the existing wiring connections on your White Rodgers thermostat. Take note of each where as seen in this image and what they correspond to. At this point use the sticker labels that come with the Nest installation kit to label the wires as they are mapped.
Read also: Nest wiring diagrams for heat pumps
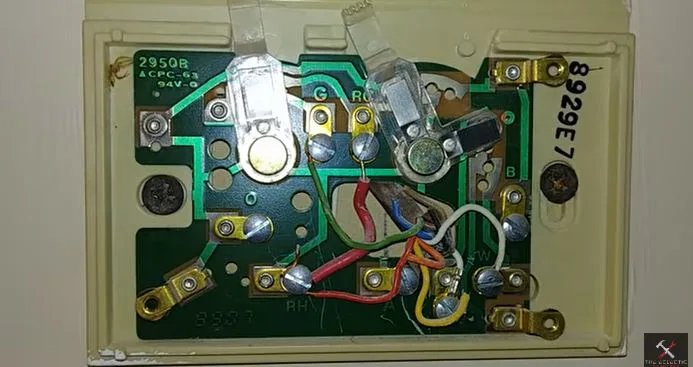
Step 3: Remove Old Thermostat
To remove the White Rodgers thermostat from the wall,unscrew it from the wall plate. Don’t always trust the wire colors, so it’s important to label them the way they were wired
Step 4: Install Nest Thermostat Base
Follow the installation instructions provided by Nest to install the Nest thermostat base on the wall. The installation kit usually comes with an inbuilt level so there is no need to worry about leveling it.
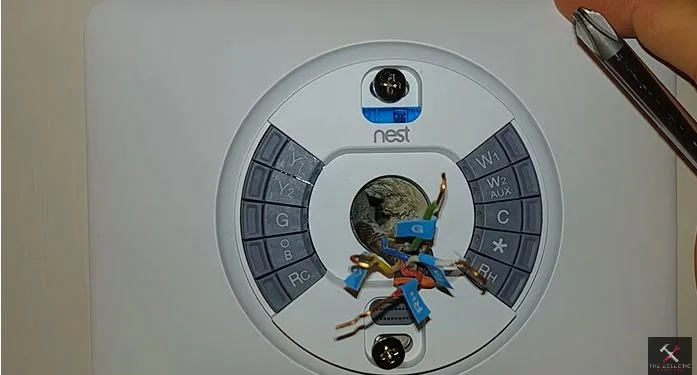
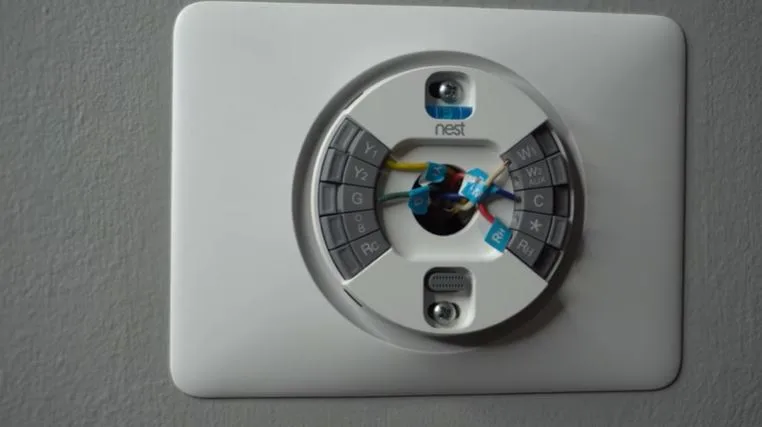
Step 5: Connect Nest Thermostat Wiring
Now use the screwdriver to secure the nest backplate into the wall
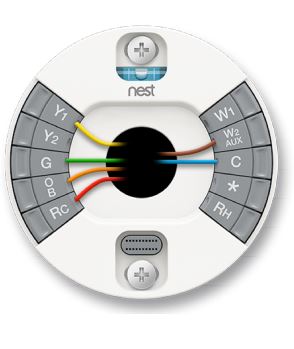
Using the wiring labels provided by Nest, connect the wires from the White Rodgers thermostat to the corresponding terminals on the Nest thermostat base.
Typically, the wiring connections from White Rodgers to Nest are as follows:
- White Rodgers “R” wire to Nest “R” terminal (power)
- White Rodgers “W” wire to Nest “W” terminal (heat)
- White Rodgers “Y” wire to Nest “Y” terminal (cool)
- White Rodgers “G” wire to Nest “G” terminal (fan)
- White Rodgers “C” wire to Nest “C” terminal (common)
Note: Your White Rodgers thermostat may not typically have “C” wire and from my experience, I recommend you get the nest power connector for your Nest thermostat So that you do not face cooling or heating problems in future
Step 6: Attach Nest Thermostat
Attach the Nest thermostat onto the base by aligning it and gently pressing it until it clicks into place.
Step 7: Restore Power
Turn the power back on to your HVAC system by switching on the circuit breaker.
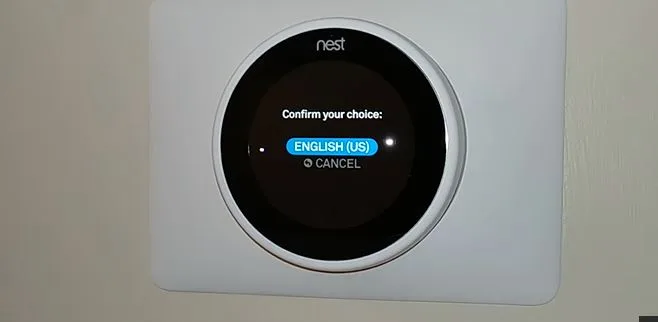
Step 8: Set Up Nest Thermostat
Follow the on-screen instructions on your Nest thermostat to complete the setup process, including connecting it to your Wi-Fi network and configuring your preferred settings.
Read also: White Rodgers Thermostat Flame Icon Blinking [Causes + Fixes]
More resouces
http://thermostating.com/thermostat-wiring-color-code-complete-guide/
![Amazon Thermostat Blowing Hot Air On Cool [Fixed]](https://thermostating.com/wp-content/uploads/2023/03/Amazon-thermostat-jpg.webp)
![Thermostat Wiring Color Code [Complete Guide]](https://thermostating.com/wp-content/uploads/2023/06/wire-color-code-768x395.jpg)
![Heat Pump Emergency Heat Not Working [Fixed]](https://thermostating.com/wp-content/uploads/2023/08/rusted-heat-strips-768x429.jpg)
![Amazon Smart Thermostat Wiring Diagram for Heat Pump [Full Guide]](https://thermostating.com/wp-content/uploads/2023/04/amazon-thermostat-1-jpg.webp)