
SAFETY: Turn off power at the breaker before touching any thermostat wiring. Confirm the old thermostat’s display is dark before removing it. If your old thermostat contains mercury, don’t touch a spill directly, and dispose of the sealed unit as hazardous waste, not household trash.
The good news: a current White-Rodgers thermostat uses the same RC, RH, C, W, Y, G, O, and B terminal letters as Honeywell, Nest, or ecobee. The part that catches people is a small red jumper wire that ships loose in the box, easy to lose or skip, plus the fact that plenty of White-Rodgers thermostats still on walls predate that standard entirely. This page covers the real terminal mapping, the jumper trap, and what changes on an older or mercury base. For the general terminal-matching method, start with the thermostat wiring guide; for everything Nest does differently from a standard swap, see Nest thermostat wiring.
TL;DR
| Your situation | What to do |
|---|---|
| Modern White-Rodgers base (RC, RH, C, W, Y, G visible) | Standard letter-matching swap onto the Nest; see the terminal table below |
| 4-wire, single transformer, no C wire | R to Rc/Rh, W to W1, Y to Y1, G to G. Add a C wire or Power Connector for reliable Nest power |
| A loose red wire jumpered between RH and RC on the old base | That’s the factory jumper for a single-transformer system. Leave it behind; the Nest bridges Rh/Rc internally |
| Two separate wires on RH and RC, no jumper present | Two transformers. Land each in its own Nest connector; never jumper them. Full decision tree: Rc/Rh jumper wiring |
| Old round or square thermostat with a mercury switch | Non-standard terminal labels are common on these. Photograph and label before removing the mercury switch plate |
| Wires labeled with numbers, or letters like M/H/V/F | A legacy White-Rodgers base. Don’t assume standard letters; trace each wire to the equipment end |
White-Rodgers to Nest: the terminal mapping
| White-Rodgers terminal | Nest connector | Function |
|---|---|---|
| RC | Rc | 24V AC power, cooling side |
| RH | Rh | 24V AC power, heating side |
| C | C | Common, gives the Nest constant power |
| W (or W1) | W1 | Heat call |
| Y (or Y1) | Y1 | Cooling call (compressor) |
| G | G | Fan |
| O/B | OB | Heat-pump reversing valve |
On a single-transformer home (most residential systems), RC and RH carry the same 24V feed and both need power. On a White-Rodgers base that shows a single R terminal instead of separate RC/RH, treat it the same as R on any other brand: it goes into either the Nest’s Rc or Rh connector, and the Nest’s internal bridge does the rest.
The jumper trap: a loose wire, not a built-in bridge
This is the part that’s specific to White-Rodgers. Some other brands build the single-transformer jumper into the subbase as a metal clip, or into the smart thermostat as an internal switch. White-Rodgers ships it as a separate red jumper wire, loose in the box, that the original installer was supposed to connect between RH and RC. On a 4-wire, single-transformer heat/cool system, the manufacturer’s own wiring diagram shows this red jumper wire explicitly, with a note that it “must be connected between thermostat RH and RC terminals for proper thermostat operation with this system.”
That’s an easy step to skip, lose, or half-do during a rushed original install, and it’s exactly the kind of thing a homeowner staring at a decades-old base won’t recognize for what it is. Two things follow from this:
- If you find a loose red wire jumpered between RH and RC on the old White-Rodgers base, that confirms a single-transformer system. Leave the jumper on the old thermostat. Do not carry it to the Nest. The Nest’s internal electronic bridge between Rh and Rc handles this automatically, and its connectors won’t accept two wires in one port anyway.
- If you find two separate wires, one on RH and one on RC, with no jumper, that’s a two-transformer system (a separate furnace transformer and AC transformer). Land each wire in its own Nest connector and never jumper them; on an out-of-phase pair, forcing that connection can push up to 48V AC across the short and damage a transformer or blow the furnace board’s fuse.
If you’re not sure which of these you’re looking at, the full decision tree, including how to test for it with a multimeter, is in thermostat Rc/Rh jumper wiring.
Older and mercury White-Rodgers bases: the letters may not match at all
The RC/RH/C/W/Y/G/O/B set above is current. It was not always the standard. Documented older White-Rodgers thermostat lines used terminal labels specific to that era’s model series, not the letters in use today: combinations like “4, W, RC, Y, G” on one series and “M, H, V, C, F” on another, where V mapped to what’s now RC and F mapped to what’s now G. If your old thermostat’s terminals don’t look like RC/RH/C/W/Y/G, you’re likely looking at one of these legacy label sets, and the safe move is to trace each wire to what it actually does at the furnace or air handler end rather than guess from the letter printed on the base.

Mercury White-Rodgers thermostats add a physical wrinkle on top of the label issue. These older round or square units switch heating and cooling calls with a glass mercury bulb tilted by a bimetallic coil, and the wire terminals sit underneath it. To reach them:
- Turn off power at the breaker and confirm the display (or the mechanical dial) shows no activity.
- Snap off the outer cover to expose the adjusting knob and inner mechanism.
- Remove the second plate that houses the mercury switch itself. This is a separate piece from the outer cover on most round and square mercury models.
- The wire terminals are underneath. Photograph them before disconnecting anything, and label each wire by its terminal, not its color.
- If the glass bulb is cracked or you see a silvery bead loose in the housing, that’s mercury. Don’t touch it directly. Wearing non-absorbent gloves, place the sealed unit in a container and dispose of it as hazardous waste, not household trash; most municipalities and thermostat retailers have a mercury take-back program.
Wiring by wire count
4-wire (R, C, W, Y)
The clean case: R to Rc or Rh (plus the jumper situation above if RH/RC are separate), C to C, W to W1, Y to Y1. With a C wire present, the Nest gets constant power from the start.
3-wire (R, W, and either C or Y, no G)
A 3-wire White-Rodgers setup is usually a heat-only or heat-and-cool-without-fan-control system. If the third wire is C, wire R, C, and W and skip Y and G entirely; the system has no separate cooling call for the thermostat to manage. If the third wire is Y instead of C, you have heat and cool but no C wire, and the Nest will need power sharing (see below) or a dedicated C wire before it’s reliable.
2-wire (R and W only)
Heat-only, no C wire, no cooling call. This is the sparsest case: land R on Rc or Rh and W on W1, and expect the Nest to run entirely on power sharing since there’s no fan or cooling wire to borrow current from either. If you see connection drops, clicking, or a battery warning, this is the setup most likely to need it.
No C wire: what to do
Older White-Rodgers installs commonly predate the C wire, especially 2-wire and 3-wire setups. A Nest can run on power sharing, borrowing current through the heating and cooling wires when the equipment is idle, but on systems with little standby current available you’ll see symptoms: Wi-Fi drops, clicking relays, a furnace or fan that blips on for no reason, or a battery warning after a few hours off the wall. Two permanent fixes:
- A real C wire, if there’s a spare conductor in the wall. Check whether it’s usable as common before landing it: can the Nest blue wire be used as a C wire?
- The Nest Power Connector, Google’s official adapter that installs at the control board and removes the need to pull new cable. Full option list, including third-party adapters: installing a thermostat without a C wire
Replacement steps
- Turn off power at the breaker. Confirm the old thermostat’s display is dark.
- Remove the cover. On a mercury model, also remove the mercury-switch plate (see above).
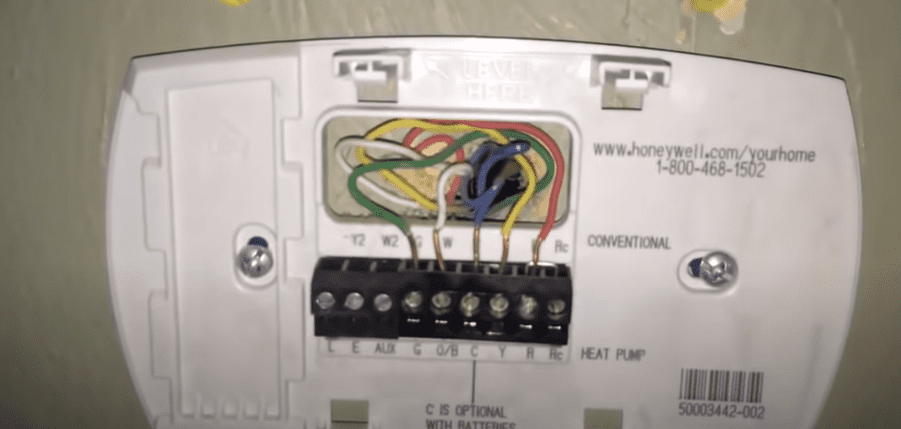
- Photograph the wiring, then label every wire by its terminal letter, not its color. If the labels aren’t RC/RH/C/W/Y/G/O/B, you likely have a legacy base; trace wires to the equipment end instead of guessing.
- Note the RH/RC situation: a loose red jumper wire present means single transformer (leave it behind); two separate wires with no jumper means two transformers (land each in its own Nest connector).
- Unscrew the wires, cap the cable end so it can’t slip into the wall, and remove the old base.
- Mount the Nest base, feed the wires through, and land each labeled wire on its matching connector.
- Attach the display, restore power, and complete setup in the app. Confirm the app’s detected-wire list matches what you connected.
- Test heat, cool, and fan. On a heat pump, confirm cooling actually blows cold air; if it heats instead, flip the O/B setting in the app rather than moving a wire.
⚠️ Know when to stop
Thermostat wiring is 24 V AC low voltage — safe to handle once you cut power at the breaker (do it anyway; a short can kill the transformer or blow the board fuse). But stop and call an HVAC pro or electrician if you hit any of these:
- Line voltage (120/240 V): thick wires with wire nuts, often on baseboard or wall-heater thermostats. Miswiring these can injure you or start a fire.
- Gas components: anything past the furnace control board — gas valves, ignitors, pilot assemblies.
- Refrigerant lines or sealed-system parts on heat pumps and AC units.
- No idea which system you have: if the wiring doesn’t match any diagram here, photograph it and get a pro’s eyes on it before guessing.
FAQ
Are White-Rodgers thermostat terminals the same as Nest’s?
Current White-Rodgers thermostats use the same universal letters (RC, RH, C, W, Y, G, O/B) as Nest and every other 24V brand, so a modern White-Rodgers base maps directly. Older and mercury White-Rodgers models used different, model-specific labels; check yours against the legacy examples above before assuming a standard swap.
What is the red jumper wire on my White-Rodgers thermostat?
A loose jumper wire, shipped in the box, that connects RH and RC on single-transformer systems so both sides see the same 24V feed. Leave it on the old thermostat. The Nest bridges Rh and Rc internally and its connectors reject a second wire in one port.
Does a White-Rodgers-to-Nest swap need a C wire?
Not always. Many systems run on power sharing. But older White-Rodgers installs frequently lack a C wire in the first place, and that’s the setup most likely to show Wi-Fi drops or clicking relays. A C wire or the Nest Power Connector fixes it permanently.
My old White-Rodgers thermostat has a mercury switch. Is that dangerous?
The sealed bulb is safe to handle from the outside. Don’t puncture or tilt it hard enough to crack the glass, and don’t touch a spill directly. Dispose of the whole unit as hazardous waste rather than the trash; many hardware stores and municipalities take mercury thermostats back for free.
My White-Rodgers terminals are labeled with numbers or letters I don’t recognize.
That’s a legacy base predating the current RC/RH/C/W/Y/G/O/B standard. Don’t guess from the label. Trace each wire to the furnace or air handler terminal it lands on, or have a technician confirm before wiring a Nest to it.
Last reviewed: July 2026